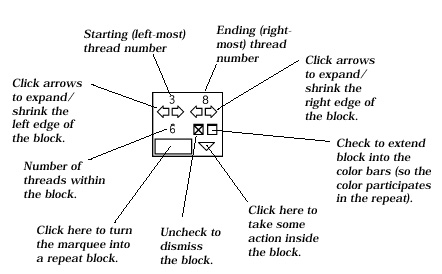
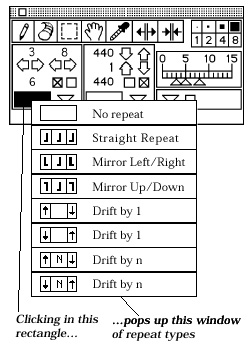
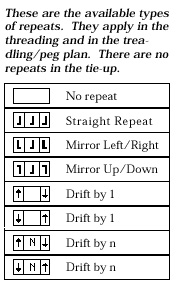
Block Repeats
If you click on the repeat rectangle
in the Tools window, a
menu of block repeat types pops
up (right).
Run the mouse over the types
while holding the mouse button
down. Note that the type under
the mouse turns black. Releasing
the mouse over a blackened
type directs WeaveMaker to
proceed (to not take any action,
move the mouse off the pop-up
window and release the mouse
button).
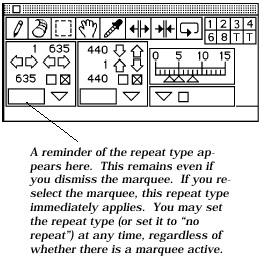
When you release the mouse
button, the pop-up window disappears.
The repeat type you se-lected,
if any, is then performed
and the reminder rectangle is
filled with a picture of the tool you
selected (illustration at right).
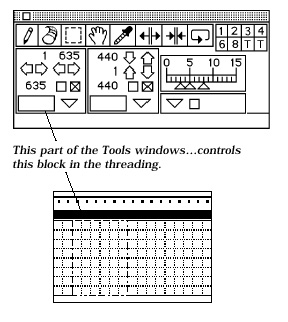
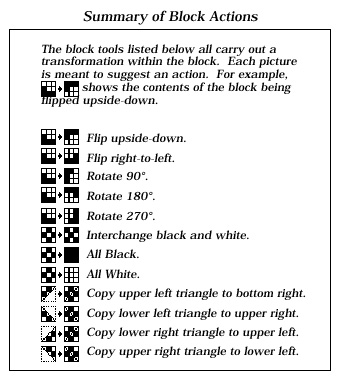
Each grid (threading, treadling,
tie-up, or peg plan) has its own
set of block tools. These are
explained in detail in the following
section.
When you first select a repeat
type, it takes place immediately
(that is, the contents of the block
are repeated). The repeat persists
until you dismiss the block or set
the repeat type to “no repeat.”
When you dismiss the block, the
repeat type is not forgotten. Its
picture remains in the reminder
rectangle (as illustrated below). If you reactivate the block,
the repeat type immediately is
resumed, as though you had just
selected it with the mouse via the
pop-up menu.
|