Warp/Weft Colors Table
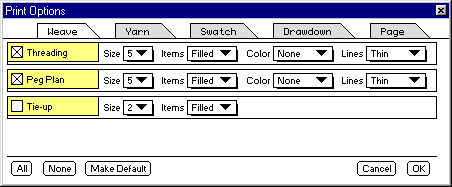
Selecting “Color Table” in Print
Options adds one page to the
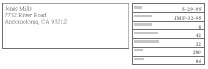
printout. The page holds two
tables, similar to the example
below, giving the color codes
used in the warp and weft, the
count of ends or picks in each
color, and the percentage of
ends or picks which are of each
color.
The example shows a warp
arrangement of 50 ends, using 7
separate colors. Each color is
identified by an arbitrary code
letter. In this example, each
color is used for either 5 ends or
10 ends.
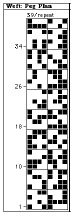
In the actual printout, there will
be two tables; one for warp and
one for weft.
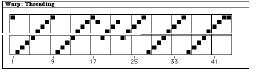
The code letters, while arbitrary,
are consistent throughout all
WeaveMaker printouts for a
given design. Thus, color “g” in
this table names the same color
as the color letter “g” where it
appears in a warp or weft
threading table (n some other
design, however, “g” would be a
different color that that used for
this design).
assignment). Weave simulations
require a color printer.