WeaveMaker User's Manual — Using Color
The following material assumes you have successfully created a palette and now wish to use those colors in a fabric.

To use color in a fabric, the desired colors are dragged from a palette file into the fabric’s colorway window. That topic is covered in the section (below) entitled “Color Dragging.” From the colorway, colors are assigned to individual threads in the warp and weft either manually (using the color crayon) or automatically (using the cornucopia tool). See “Coloring Fabrics” (below) for the details.

Colorway Window
The colorway window has a number of fields and controls. These will be explained in detail in the following sections. But here is an overview of how the window is organized.

The colorway window has six columns and one or more rows of color chips (see below). Each row is a colorway for your fabric, so the number of rows depends on how many colorways you want to work with.

The columns divide the colors into six groups, which help the color cornucopia schemes assign colors to the fabric. If you are not planning on using the cornucopia for color, you can ignore the columns and put color chips wherever you wish.

Across the bottom of the colorway window are a set of buttons. These add colorways, delete colorways, and delete individual color chips.

Color Dragging
Colors chips are moved from the palette into a fabric colorway by dragging them with the mouse. Colors can be dragged the other direction as well, that is, from a colorway to a palette.

For example, suppose you have the palette and colorway windows illustrated on the right.

When you click on a color chip the cursor changes to a crayon. Hold the mouse button down and move the mouse. The color crayon follows the mouse. Move the cross cursor over a color chip in the palette or the colorway, and the chip changes to the color of the mouse. Release the mouse button to make the change permanent.

You wish to change the black in the warp (colorway window) to the turquoise shown in the palette window.

  1. Click on the turquoise color chip in the palette

  2. drag it on top of the black chip in the warp/ major area of the colorway. Note that the black chip turns turquoise.

  3. Release the mouse while the chip is gray, and it will remain the new color.

Any color chip may be dragged in this fashion. Color chips may be dragged within a palette, within a colorway, or between palettes.


All information associated with the color chip (such as its name, technical description, and printer color value) go along with the chip when it is dragged.

Adding Colorway Color Chips
To add a color chip to the colorway (rather than changing one which is already there), drag a color from the palette onto one of the column headings (such as “Major” or “Minor”). The heading turns black. Release the mouse. A new color chip will appear under that category.

Coloring Fabrics
Once a color has been established within a colorway, it can be assigned to individual threads in a fabric. There are two ways to do this:

Manual Coloring
Momentarily clicking on any color chip within the colorway window gives a colored crayon (the cursor changes into a crayon). Click with this crayon in the color bars of the design window to assign color to individual threads.

Cornucopia Coloring
Clicking with the cornucopia tool in the color bars of a fabric causes WeaveMaker to assign colors automatically. The colors are drawn from the appropriate parts of the colorway (warp colors from the pool of warp colors, weft colors from the pool of weft colors).

For most cornucopia color schemes, most of the threads will be colored using colors chosen from the “major” category, some threads will be given “minor” colors, and just a few threads will have “accent” colors.

Colorway Tools
The tools at the bottom of the Colorway window (see illustration on facing page) create and delete colorways and erase individual color chips.

To use the delete tools, first click on the tool to select it, then move the cursor into the part of the Colorway window which holds the color chips. The cursor changes shape to match the tool you selected. Click the mouse button to activate the tool. The color chips which are to be deleted turn red. Releas-ing the mouse button deletes all the highlighted chips.

Multiple Colorways
WeaveMaker provides a simple mechanism for associating multiple colorways with a fabric. 
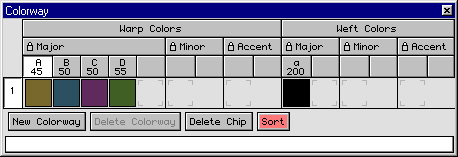
Each row of color chips across the colorway window defines a distinct colorway (all the examples shown so far have just one row of colors, meaning the fabric has one colorway).

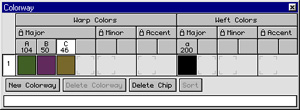
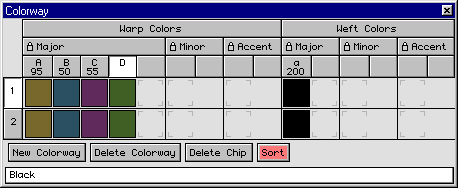
To start a new colorway, click the “New” button at the bottom of the colorway window. A second row of color chips appears:

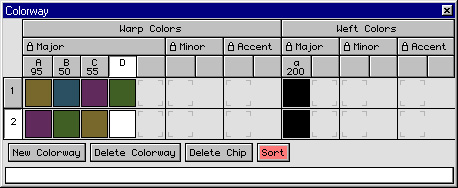
You can now replace the chips in the second colorway to suit your needs, for example:

The colors in the fabric are always taken from one row of the colorway at a time. The colorway number (at the extreme left of the window) outlined in black is the active colorway. Clicking on a colorway number (such as the “2” in the illustration) makes it the active colorway.

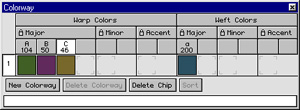
If the second colorway in the example is changed by dragging color chips from a palette and rearranging color chips within the colorway window so it looks like this, then there are two ways the fabric might be colored.

If you click on the second colorway to make it active, the fabric will be recolored.

These changes are immediately reflected in the on-screen fabric displays. You can set up a number of colorways and rapidly compare them by simply clicking on the colorway numbers and studying the changes you see in the fabric display.

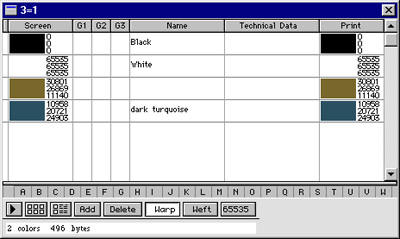
When you print a fabric in color, the active colorway is used to determine the fabric colors in the printout.