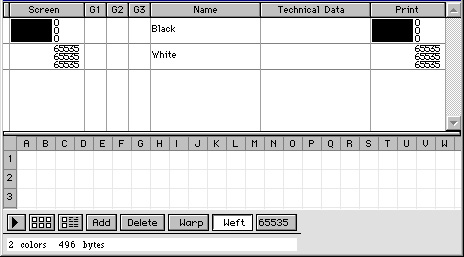
Sorting Colors
Colors within a palette can be
sorted by clicking any of the
sorting buttons (see “Sort Colors”
in the illustration at the
bottom of this page). Note that
permanent black and white (the
first two colors in every palette)
do not participate in sorting.
G1,G2,G3 - sort into alphabetical
order by group codes. For
example, clicking G1 sorts all
the palette color chips so that
their G1 codes are in ascending
alphabetical (or numeric) order.
N - sort into alphabetical order
by color names.
T - sort into alphabetical order
by technical description. If you
have assigned technical codes
from any of several commercially-
available color classification
systems, this sort order will
likely also sort the colors into a
useful visual order.
Red/Green/Blue button - sort
the color chips into hue order.
Color chips with a low hue
number (pure red, for example,
has zero hue in WeaveMaker’s
numbering system) will appear
at the front. This will be followed
by colors of blue hue and
on into the greens.
Note that some reds have high
hues (reddish purples are a good
example) and so will come last,
while others (with a slightly
orange cast) have low hue numbers
and so come near the front.
You will thus see “reds” at both
the front and the rear of the sort
order.
Light Gray/Dark Gray - sort the
color chips by brightness
(amount of black). Low bright-ness
color chips come to the
front.
Red/Pink - sort the color chips
by saturation. Low saturation
colors (those nearest to the
center of the color wheel) come
to the front.
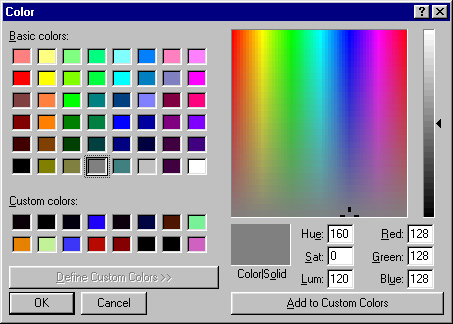
Editing Colors
To edit an existing color in a
palette, double click either on a
palette color chip or on a set of
RGB numbers (see illustration
below).
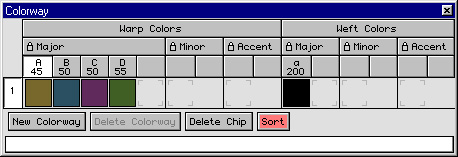
Warning! Editing a color in the
palette does just that: it edits the
color in the palette. It does not
edit the color in the design. To
edit a color within a design, first
edit it in the Palette window, and
then drag the new color into the
Colorway window of the design.


 ). This palette format minimizes
the amount of screen
space used by the palette window,
and is very convenient for
selecting colors and dragging
them into the colorway window.
). This palette format minimizes
the amount of screen
space used by the palette window,
and is very convenient for
selecting colors and dragging
them into the colorway window.